> For the complete documentation index, see [llms.txt](https://docs.natoma.ai/llms.txt). Markdown versions of documentation pages are available by appending `.md` to page URLs; this page is available as [Markdown](https://docs.natoma.ai/docs/manage-ai/profiles.md).
# Distribute Access via Profiles
Setting up connections between AI and key business apps can be repetitive. A **Profile** in Natoma is a named collection of MCP server connections that you can define once and distribute to users, so they spend less time configuring clients and re-authorizing the same apps.
**Managed profiles** are defined by an administrator and are read-only for members: they receive the exact set of connections and options the admin chose. **Personal profiles** are created by individual members (up to five per user) for their own use and remain under their control.
For organizations that have Profiles enabled, any app or tool included in a profile the member is using is available by default. When the profile is updated, members typically only need to refresh their AI client—no extra authorization flow for each change, beyond what the apps require.
## How admins set up a managed profile
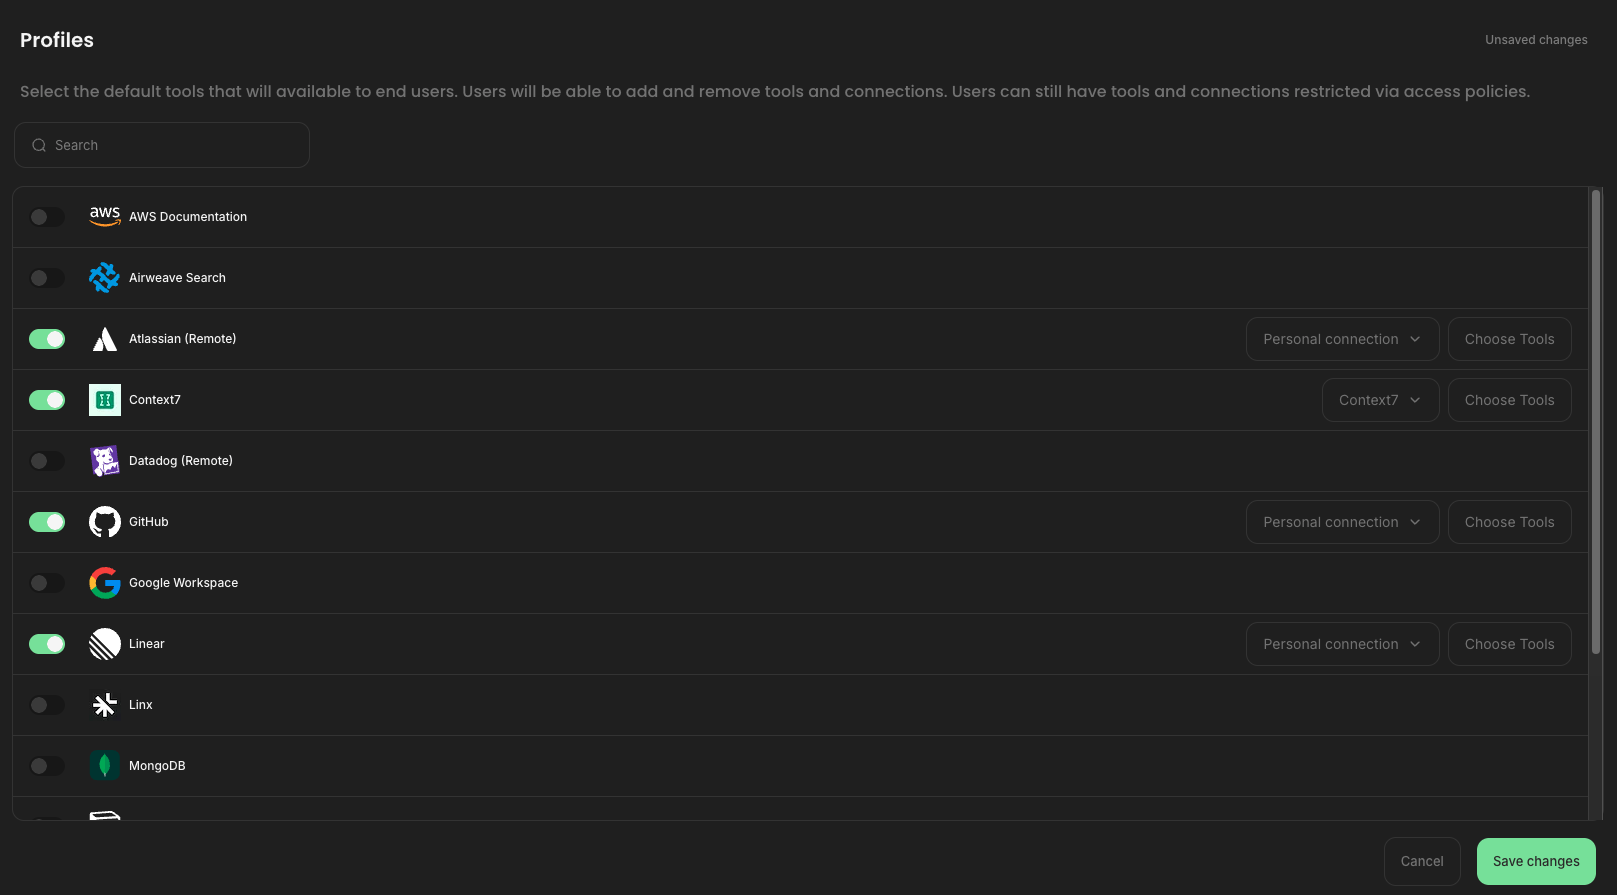
From the **Profiles** page in the sidebar, you choose which MCP servers to include and how each is connected.
#### Step 1: Select the server(s) that should be included in the profile
*Using the green toggle on the left side of the page, select which apps should be included in the profile.*
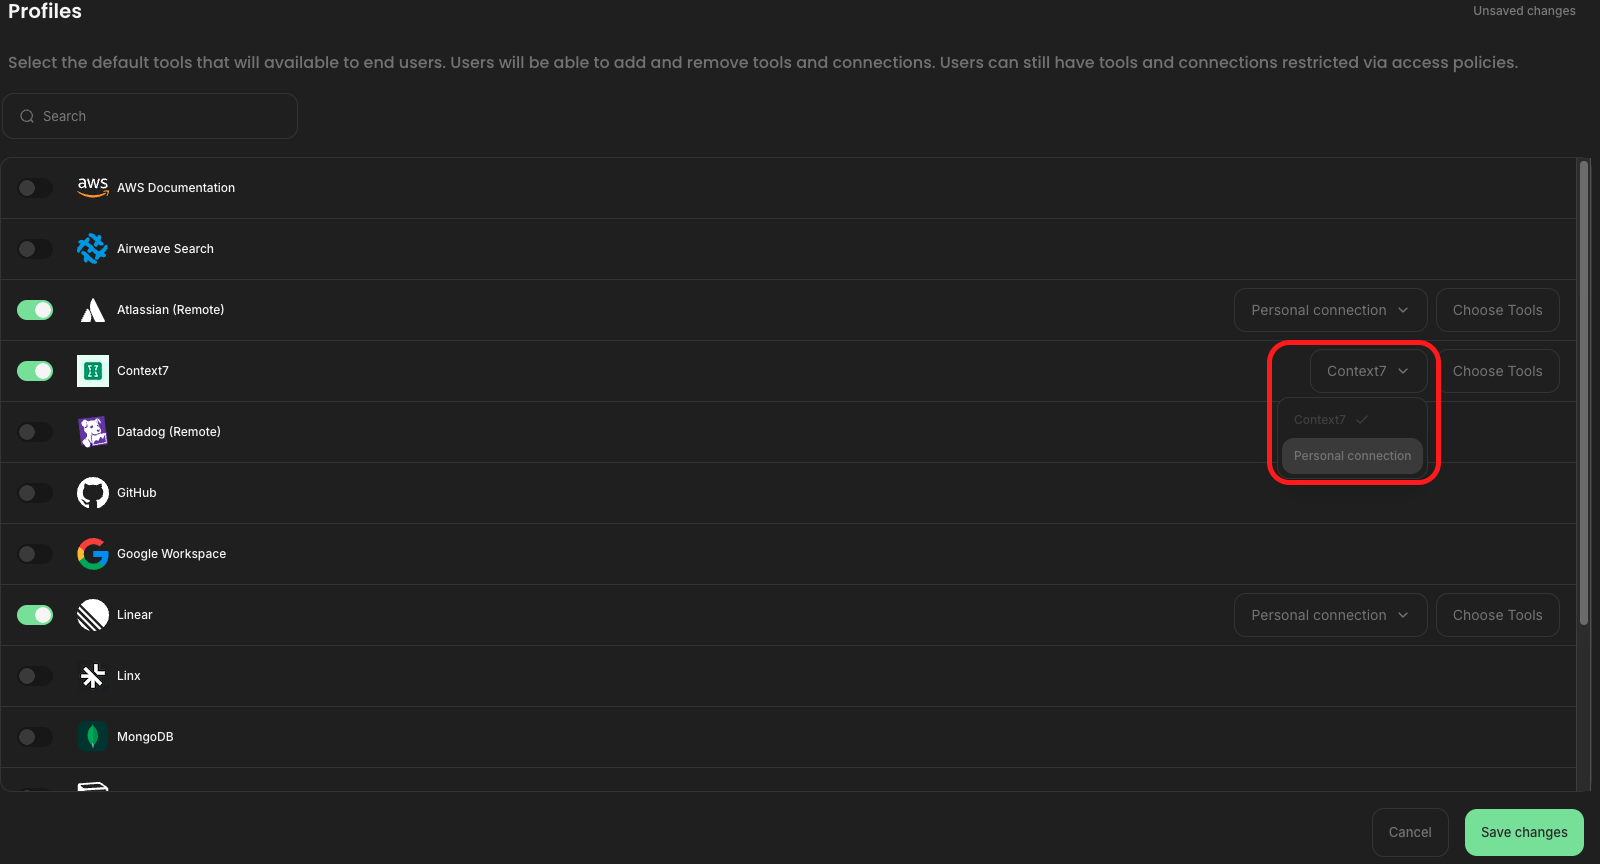
#### Step 2: Choose Managed or Personal connections per server
***Managed** connections use org-wide credentials and settings you configure as the admin, so you can* [*share access*](/docs/manage-ai/shared-access.md) *across the team. **Personal** connections use each member’s own credentials; you enable the app, and the member completes setup.*
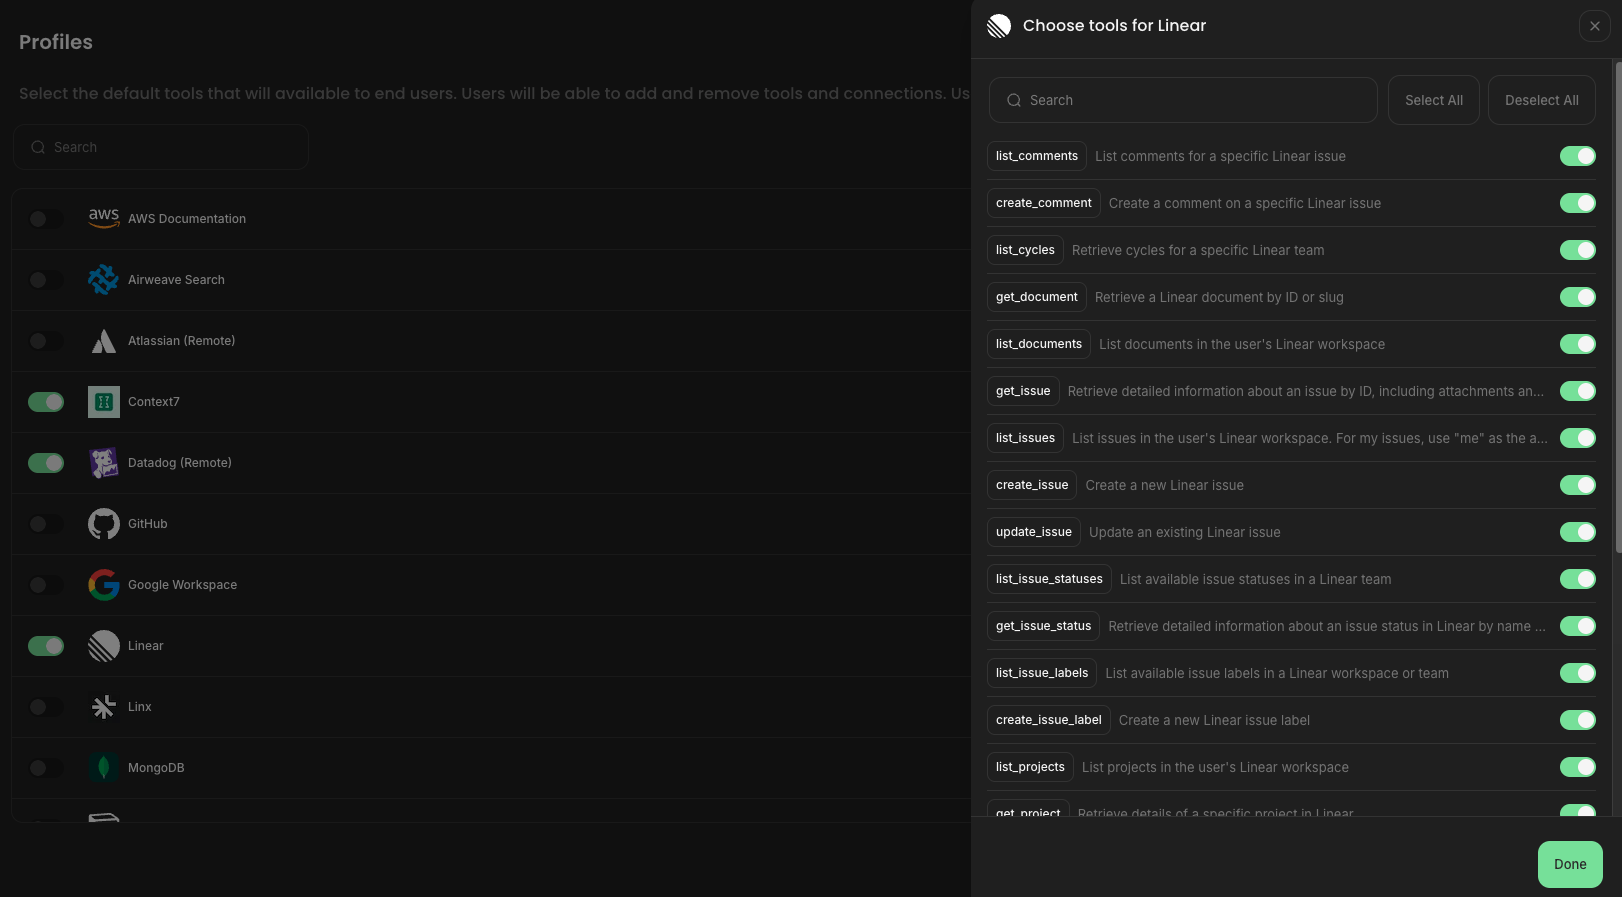
#### Step 3: (Optional) Limit which tools are enabled by default
*All tools your organization allows for an app may be available; you can include only a subset of them in the profile so they are enabled by default for members on that profile.*
*Note:* [*Access control policies*](/docs/enterprise/granular-access.md) *still govern whether an AI can call a tool. What you include in the profile controls what is on by default in the client.*
#### Step 4: Name and use the profile
*You can maintain multiple profiles for different teams or use cases. Members with access see the resulting **managed profile** and any **personal profiles** they create in the product.*
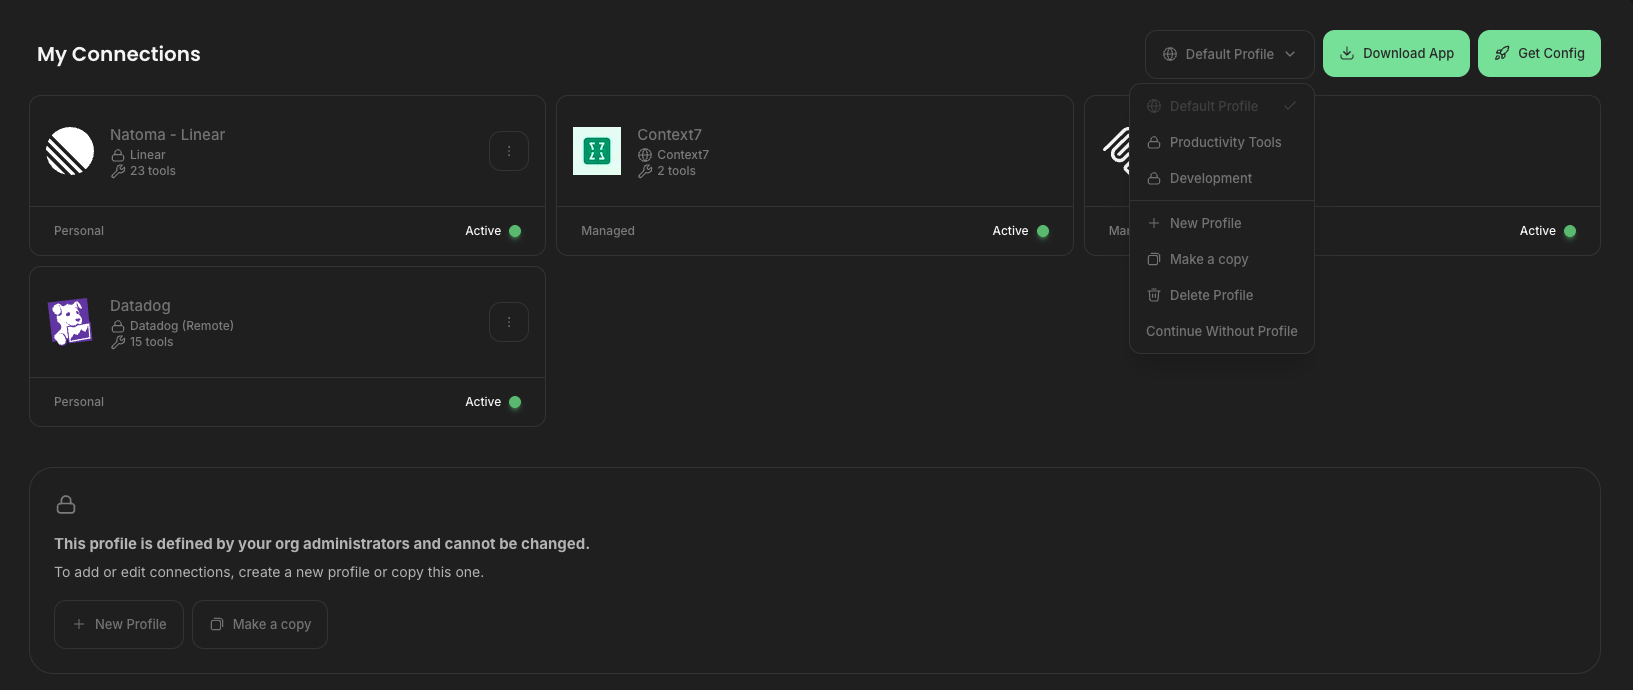
When you publish a managed profile for the organization, members automatically receive a managed profile with the servers and options you configured (they cannot edit that definition).
## How members use profiles
Members open **My Connections** and use the **Profiles** dropdown to switch between the managed profile(s) their org assigned and up to five personal profiles they build themselves. Switching profiles changes which connection set is active for configuration and for shareable URLs (see below).
## Shareable URLs
**Shareable URLs** are human-readable, slug-based links for MCP server connections and for whole profiles—for example, a path like `https://yourorg.mcp.natoma.app/v2/profile/your-profile/github/mcp` instead of an opaque ID.
They matter because they are **persistent** (the URL does not change when a profile is renamed), **readable** (you can tell what you are installing at a glance), and **shareable**—so you can drop them into onboarding guides, Slack, email, or a team `README` in GitHub.
On **My Connections**, in **Get Config**, you can choose **Individual install URLs** to copy one link per connection, or **Combined profile URL** to copy a single shareable URL for the whole profile. Natoma generates the right format for your selected client, including **Claude Desktop**, **Claude Code**, **Cursor**, **Visual Studio Code**, and other common MCP clients.
When you share a combined profile URL, recipients get the same profile bundle in the format their client expects—no need to juggle several opaque endpoints by hand.